
The Doom Slayer has traded his futuristic arsenal for medieval, blood-soaked brutality in Doom: The Dark Ages, and the learning curve is steeper than a mountain of demon skulls.
This isn’t just another gore-soaked run-and-gun; it’s a strategic shift that demands mastery of new weapons, resource management, and a deeper understanding of enemy weaknesses.
Forget everything you knew about constant dashing and infinite ammo—the Dark Ages requires planning, precision, and a ruthless commitment to carnage.
This in-depth guide is your comprehensive manual to mastering the game’s mechanics, uncovering its deepest secrets, and ensuring your glorious, score-shattering survival against the legions of Hell.
We’re diving into the core combat loop, the devastating potential of the new equipment, and the hidden systems that turn a good Slayer into an unstoppable, medieval war machine.
I. Master the Shield Saw: Defense is the Best Offense
The most significant addition to the Slayer’s equipment is the Shield Saw, a piece of gear that fundamentally changes the rhythm of combat. It’s more than a defensive tool; it’s a critical component of the combat resource economy.
A. Perfect Parry Mechanics
The Shield Saw’s primary defensive function is the Parry. Unlike a basic block, a perfect parry rewards aggression and timing.
A. Stagger and Vulnerability: A successful parry against a heavy enemy (like a Knight or a large brute) will instantly stagger them, opening them up for a devastating Execution (Glory Kill). This is your primary method for restoring large chunks of health mid-fight.
B. Ranged Weapon Deflection: The Shield Saw can deflect most incoming projectiles back at the enemy. This is vital for dealing with ranged threats like Imps and gargoyles. Deflecting a Cacodemon’s fireball back at its face is not only satisfying but also immediately sets it up for an execution.
C. Parry Window Mastery: The parry window is tight but generous when mastered. Practice the sound cue—the enemy’s specific yell or attack roar—which often precedes the hit. Use this audio cue as your primary timing marker, rather than the visual animation.
B. The Saw’s Economic Role: Ammo Generation
The Shield Saw is not the chainsaw of previous games, but it serves a similar, crucial resource-generating purpose.
A. Target Priority: Use the Saw Attack (a less protective, but still useful melee swing) primarily on smaller, weaker demons (Zombies, Imps) when you are low on ammunition. Sawing a smaller demon will always drop a large cluster of ammo for your heavy weapons.
B. Strategic Ammo Farming: When the arena is cluttered with fodder, deliberately save them until your heavy weapon magazines are depleted. Cycle between your primary weapons and use the Shield Saw to harvest ammo in quick bursts. This ensures the loop of Attack-Harvest-Attack remains unbroken.
C. Avoiding Overkill: Never use a full melee combo or a heavy shot on a fodder enemy if you need ammo. The Saw Attack is efficient; overkilling is a waste of precious damage output and time.
II. The Arsenal of the Dark Ages: Old Firepower, New Rules
The weapons in Doom: The Dark Ages feel weighty and impactful. Each one has a specific role, and maximizing your score means knowing the optimal switch sequence for every encounter.
A. Skull Crushing Melee and Super Shotgun Mastery
The traditional Doom workhorses are back, but with a medieval twist.
A. The Flail/Mace (Primary Melee): The Slayer’s basic melee weapon is powerful, but use it only when you have staggered an enemy or are clearing very weak fodder. Its charge-up attack is excellent for breaking enemy armor or shields instantly, making it a crucial opening move against armored foes.
B. The Super Shotgun (Ballista Equivalent): This is still your bread-and-butter damage dealer. Its Meat Hook equivalent, a chained blade, is now a Grappling Hook that allows you to rapidly close the distance to any enemy. Use the grapple hook not just for movement, but for instantly staggering flying or fast-moving demons for a point-blank blast.
C. Grapple-Blast-Switch Loop: The most efficient damage sequence: Grapple an enemy, fire the Super Shotgun at point-blank range, and immediately switch to a different weapon (like the Rocket Launcher) while the enemy is recovering to maximize damage output during the brief vulnerability window.
B. Siege Cannon and Rocket Launcher Precision
These weapons are your heavy hitters, designed for crowd control and taking down armored behemoths.
A. Siege Cannon (Precision Heavy Hitter): The Siege Cannon fires a slow, powerful projectile ideal for weak points. Always use its secondary fire (a charging shot) to hit targets like the Mancubus’s exposed heart or the Pinky’s exposed tail end. Its slow projectile speed demands foresight and excellent lead-aiming.
B. Rocket Launcher (Crowd Control and Stagger): The Rocket Launcher excels at area denial and staggering multiple enemies simultaneously. Its secondary fire often includes a lock-on or cluster-bomb feature. Use the cluster-bomb feature against large groups of low-to-mid-tier demons to quickly clear the area and isolate the heavy targets.
C. Ice Bomb Equivalent (The Sigil of Frost): Identify the game’s equivalent of the Ice Bomb. This tactical gear is essential for freezing one heavy target to focus damage elsewhere, or for stopping a crowd of enemies that have surrounded you. Save this for emergencies or to set up a high-value, multi-kill combo.
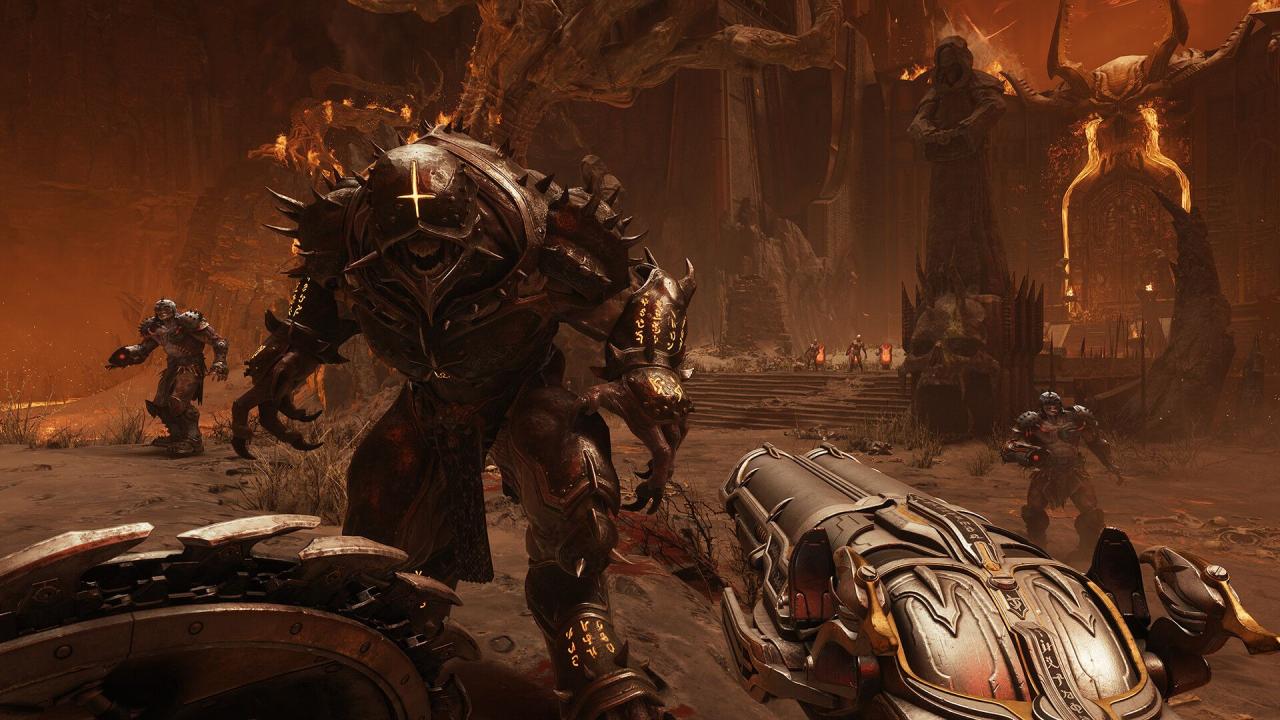
III. The Draconian Threat: Weakness Exploitation
Every demon in the Dark Ages bestiary has a specific weakness that, when exploited, yields massive damage bonuses and increases your score multiplier. Successful survival depends on immediately identifying and exploiting these vulnerabilities.
A. Visual and Auditory Cues
The demons, while visually redesigned, retain behavioral cues from previous Doom titles that signal their weakness or next attack.
A. Color Change: When a demon is about to perform a heavy, unblockable attack, its eyes or body often flash a specific color (usually red or orange). This is your cue to Sidestep or use a protective Shield Saw stance, not to attack.
B. Armor Cracks: Armored demons (like the Hell Knight) often have visible cracks or glowing weak points on their armor. Use the Mace’s charged attack or the Siege Cannon’s precision shot to break these points instantly, staggering the demon and exposing its core.
C. Unique Roars: Learn the specific roar of each heavy demon. The Baron of Hell’s roar might signal a slow, linear charge, while the Revenant’s might precede a rapid missile volley. This auditory cue allows you to prepare the correct counter-weapon instantly.
B. Prioritized Target Elimination (The Kill Chain)
In a crowded arena, you must execute a specific kill chain to manage the overwhelming threat level.
A. The Flying Threat First: Flying enemies (Revenants, Cacodemons) must always be the top priority. They are difficult to hit, have high mobility, and can flank you while you’re focused on ground targets. Use the Super Shotgun’s Grappling Hook to pull yourself to them or the Siege Cannon for a quick, precise kill.
B. The Spawning Threat (Portals): If the arena has demon portals, destroy the portal-generating enemy or the portal itself immediately. Allowing the enemy count to skyrocket makes resource management impossible.
C. The Heavy Tank Last (Glory Kill Farm): Save the heaviest, most resistant demons (Barons, Tyrants) for last. By this point, you should have executed several fodder and mid-tier demons, maximizing your health, armor, and ammo reserves before the final confrontation.
IV. Movement and Environmental Mastery: The Arena is Your Weapon
The Dark Ages arenas are vast, multi-layered, and filled with environmental hazards and benefits. Movement is combat, and mastering the flow of the environment is as important as mastering the weapons.
A. Aerial Combat and Verticality
Unlike many first-person shooters, Doom rewards using the vertical space aggressively.
A. Double-Jump and Dash Reset: Use the double-jump and the quick dash (if available) to traverse the battlefield rapidly. Crucially, many ledges or environmental elements will reset your dash, allowing for extended aerial maneuvers and repositioning.
B. Platforming to Safety: When surrounded, quickly use a wall-run or double-jump to reach a high platform. This grants a brief moment of safety, allows you to identify key targets, and gives you the high ground advantage for precision shots.
C. Using the “Gore Poles”: Identify any new environmental tools that function like the classic “Gore Poles” or swing bars. These are specifically placed to allow for instant, high-speed traversal across large gaps, essential for avoiding area-of-effect attacks.
B. Environmental Damage Exploitation
The environment is often your deadliest weapon, particularly against large, slow demons.
A. Explosive Barrels and Runes: Look for any exploding runes, pots, or barrels scattered throughout the map. Group enemies near these spots using the Rocket Launcher’s concussive blast, then detonate the hazard for massive free damage and area staggering.
B. Pit Kills (The Abyss): Large, slow demons can often be tricked or pushed into a fatal abyss. Use the Super Shotgun blast or a well-timed Shield Saw charge to knock a heavy enemy off a ledge for an instant, satisfying, and resource-saving kill.
C. Weapon Pickups: Always know the location of the Bigger Weapons and Power-ups in the arena. Plan your movement loop to include passing these power-up locations when the fight is at its most difficult, ensuring you grab the needed resource at the critical moment.
V. Advanced Score and Resource Management
To truly conquer Doom: The Dark Ages and achieve those legendary high scores, you must look past simple survival and focus on maximizing resource returns and maintaining the score multiplier.
A. Maintaining the Combo Multiplier
The core of the high-score system is the Multiplier. It increases with every kill and resets if you go too long without dealing damage or executing a kill.
A. Fodder is the Fuel: Smaller, weaker demons are the fuel for your multiplier. Do not clear them all at once. Instead, keep a few scattered around the arena. When your multiplier timer is about to run out, quickly execute a fodder demon to reset the timer and maintain the high multiplier.
B. The Glory Kill Time Stretch: Executing a Glory Kill (Execution) often grants a brief moment of invulnerability and, crucially, pauses or slows down the multiplier timer. Use this as a breathing room technique to quickly look around the arena and plan your next move without losing your score chain.
C. Weapon Swap Bonus: Some systems reward rapid, skilled weapon swapping. Ensure you don’t stick to a single weapon; the more variety and seamless transitions you make, the higher your hidden style score and overall point accumulation will be.
B. Armor and Health Management Secrets
The classic Glory Kill (Health) and Chainsaw Equivalent (Ammo) are augmented by the Flame Belch Equivalent (Armor). Mastering this loop is non-negotiable.
A. The Triple Loop: Your survival is a perfect loop: Health from Glory Kills, Ammo from the Shield Saw (on fodder), and Armor from the Flame Belch equivalent (burning enemies). Always use the Flame Belch when surrounded by enemies to instantly generate armor shards and mitigate incoming damage.
B. Overdrive Resource Management: The game will introduce a powerful Overdrive or Berserk mode. Do not use this mode to clear the arena of easy fodder. Save Overdrive exclusively for the final waves or the heaviest demon groups to guarantee maximum damage output when it matters most.
C. The Final 1% Rule: Never let your health completely stabilize. The greatest benefit from a Glory Kill is received when you are critically low on health. If you are at 50% health, consider saving that stagger-ready demon until you’ve taken a few more hits, maximizing the resource-to-risk reward ratio.
C. Finding Secrets and Collectibles
No Doom game is complete without hidden secrets and collectibles. These are vital for boosting your overall power and score.
A. Hidden Weapon Upgrades (Runes/Sigils): Many arena-based missions will have hidden Runes or Sigils that unlock powerful new abilities for your weapons or character (e.g., faster weapon swap, more damage on airborne enemies). Always thoroughly explore the edges and heights of every new area.
B. The Nudge and Break Technique: Look for environmental objects that look slightly out of place—a cracked wall, a different colored block, or a glowing rune. Use the Mace or Shield Saw to nudge or break these objects, revealing hidden passages or collectibles.
C. Audio Feedback for Secrets: The game designers often include a subtle audio cue (a low hum, a faint metallic sound) that grows louder as you approach a secret area. Turn up your headset volume and listen carefully when in areas that seem too quiet or dead-ended.
Conclusion
Doom: The Dark Ages is a spectacular evolution of the Doom formula, demanding not just hyper-aggression, but an intricate strategic mastery of its new medieval combat loop.
The journey to the high score is paved with shattered armor, perfectly timed parries, and a relentless cycle of resource management.
You must shed the habit of single-minded attacking and embrace the Triple Loop of survival: harvest health with savage executions, secure armor by setting foes ablaze, and replenish ammunition through the razor-sharp efficiency of the Shield Saw.
The master player understands that every decision is a calculation in a complex, real-time economic system.
When should you use the slow, powerful Siege Cannon versus the rapid, versatile Super Shotgun? The answer is always dictated by the enemy’s current vulnerability and your immediate resource need.
The true secret to conquering the Dark Ages is the ability to seamlessly integrate movement, weapon swapping, and resource harvesting into one fluid, unbroken chain of destruction.
By internalizing the principles of Target Priority (flying threats first), Environmental Exploitation (using the pits and explosive runes), and the ruthless pursuit of the Multiplier, you will cease merely surviving the demon hordes.
You will begin to dictate the terms of engagement. The Dark Ages is a brutal, beautiful canvas, and with these advanced techniques, you have the tools to paint a masterpiece of carnage worthy of the Slayer’s legend, ensuring that your final, glorious score is etched forever at the very top of the leaderboards.